Football Season is upon us and that means everyone’s favorite tailgating game returns. But this year, how about showing off your custom Cornhole Board to your friends and family? We’re giving away One Set of Cornhole Boards for Free to a lucky person who follows us on Facebook. But, you can increase your odds of winning by Following us on Twitter @DIYLOTC for an additional 3 Entry Points and Tweet @DIYLOTC for an additional 5 Entry Points! But what if you’re not a winner? Not a problem. We’re providing the full plans and How To below to get you started on your own DIY Cornhole Boards. Looking to take this tutorial with you? Download the PDF Version!
a Rafflecopter giveaway
[one_half]Tools
Jig Saw
Measuring Tape
Compass
Drill
1/2 Drill Bit
Clamps
Circular Saw
Random Orbit Sander[/one_half]
[one_half]Materials
1/2 inch plywood, 24″ x 48″ pieces (2)
2 x 4 x 11-1/2″ (4)
1-5/8″ screws
4″ x 1/4″ Carriage Bolts (4)
Wing Nuts
Washers
Wood Putty
High Gloss Paint
Outdoor Primer[/one_half]
Getting your Cornhole Board Started
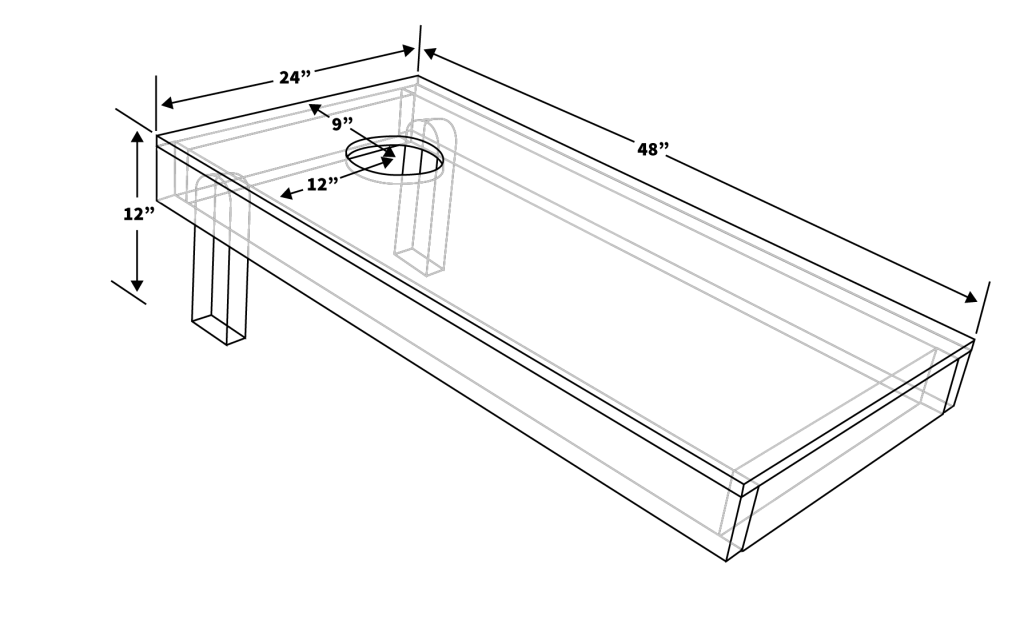
Starting your own cornhole board does mean keeping to a few standards in order to adhere to the American Cornhole Association, which requires the board to be 48″ x 24″ made from 1/2 inch plywood. In addition, the front of the board stands 2-1/2 inches tall, while the rear of the board sits 12 inches off the ground. The corn bags also follow strict regulation guidelines, but we will not be providing them as part of this tutorial. However, you can typically purchase your own for about $25 – $30.
It may also be wise to paint each part as you finish cutting and trimming them to size, as this will provide the best possible looking Cornhole Boards. For the sake of our steps however we will not mention when to paint.
Step 1: The Plywood Base and Frame
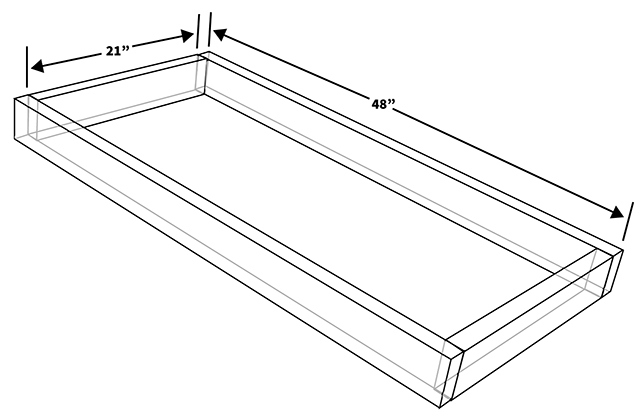
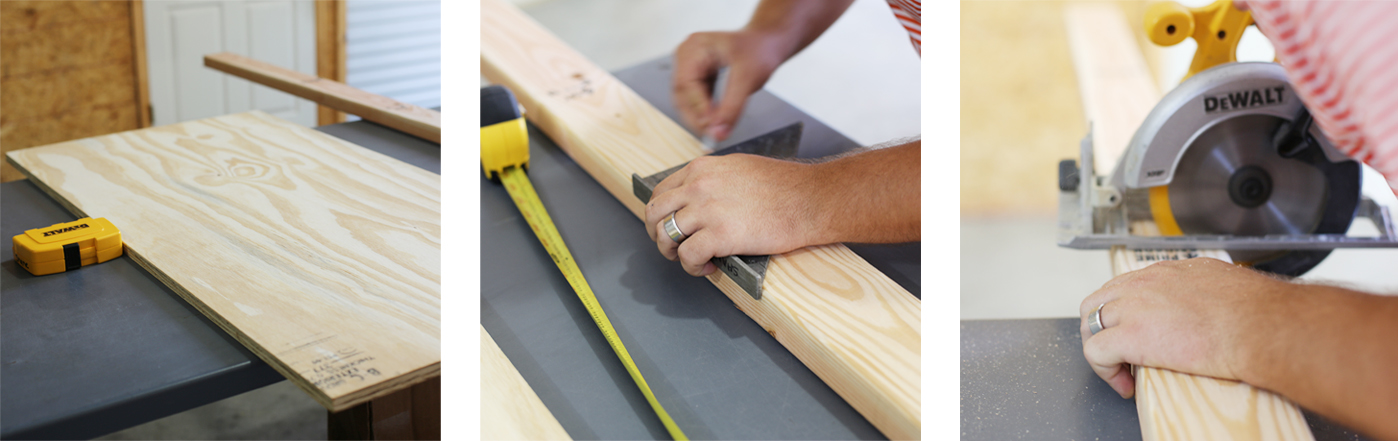
We start with our piece of plywood that will form the top of our board. In our case, we found 24″ x 48″ inch plywood sheets already cut to size at our hardware store. However you may need to cut your plywood down to size if it’s not provided in the correct measurements. Next we’ll be producing the rectangular box that will form the base for our plywood. To start, we’ll fasten the 2x4s by connecting the 21 inch pieces to the insides of the 48 inch pieces to form a 2×4 rectangular box.
Now with with our rectangular box and rectangular plywood we’ll be connecting the two pieces. For our build we’ll be using Wood Glue to connect the two parts and finishing nails. To start, we’ll be applying a line of wood glue along the top of the 2×4 box before carefully applying the plywood sheet over the top, being careful to align the two shapes flush together.
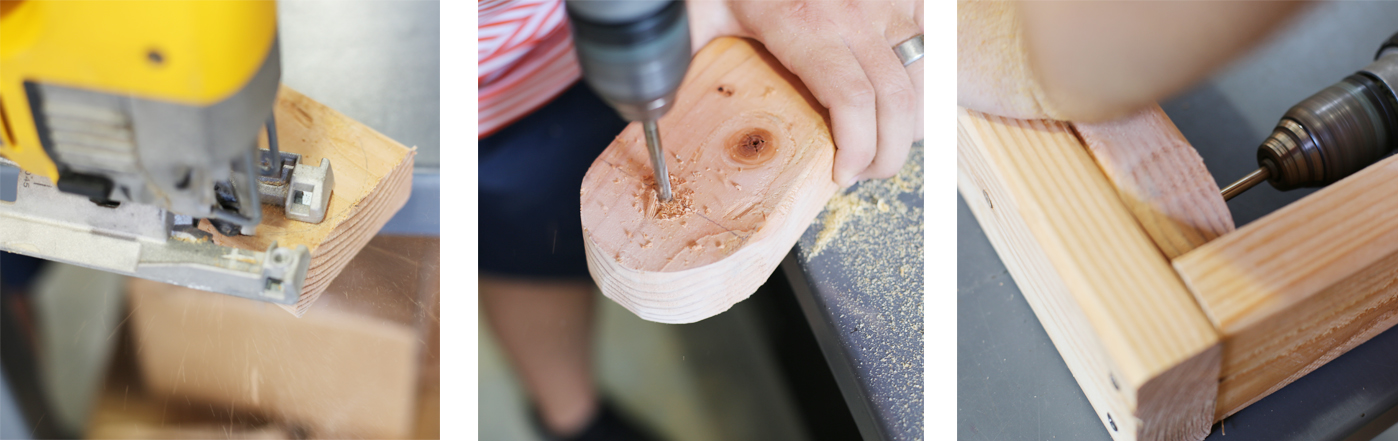
Step 2: The Legs
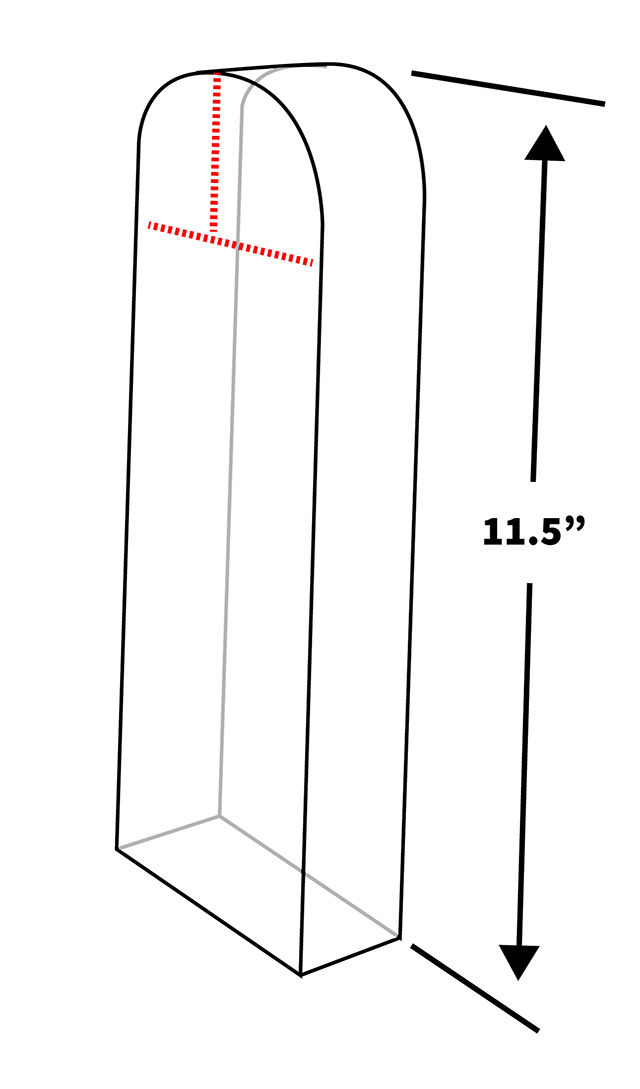
Cut (4) 2x4s t0 11-1/2″ to make up the four legs. Measuring 1-3/4″ down from the top of the legs, make a line across the board. Place a compass point centered on the line and draw a 3-1/2″ arc. You will use this drawn arc as a guide as you cut the shape using your jigsaw.
Now to attach the legs. Turn your Cornhole base upside down and lay the leg parallel against one of the top corners of the base. With the radius side of your leg in the corner. Using a clamp we will temporarily attach the leg to the base. From the inside of the base, make a mark in the center of the 2×4 leg vertically inside the radius. Now, drill a 1/2″ hole through the side of the base and through the supporting leg. We will do this on both sides of your base, for both of your cornholes.
Install your 1/4″ carriage bolts through the holes drilled into your Cornhole base and Legs. To finish, we’ll be adding a washer and wing nut to secure the legs in place. Be sure to check if the wingnut is too tight by folding the legs up and down.
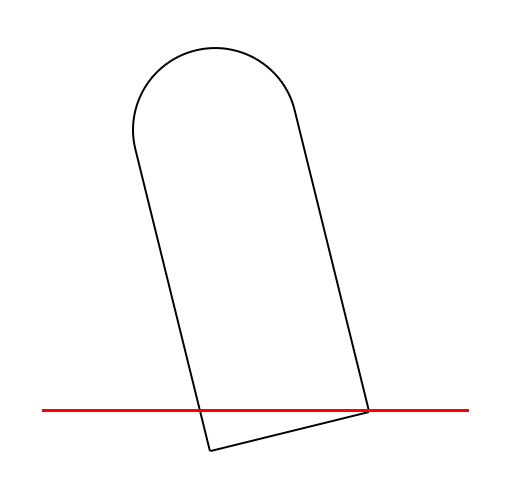
Step 3: Finishing the Legs
As you may notice, the bottom of the legs are not flush with the ground below them when we stand the Cornhole Board up. To remedy this, we’ll set the Cornhole Board onto a worktable with a few extra pieces of wood to prop the Cornhole Board up,with both legs extended. But leave one leg hanging over the edge of the table so we can see where the ground would make contact. Using your tape measure, ensure the legs extend the top of the board to 12″ in the air, as per regulation.
Now, using the tabletop as a guide, draw a straight line across the bottom of your 2×4. We’ll be using this as our cutline when we trim the legs with our circular saw. Repeat the process for both legs.

Step 4: Create the Cornhole, Hole
To find the center point for the hole, first make a mark 9″ down from the top of the board, and 12″ from either side of the board. This mark should be at the top of the board. Now, using our compass we will mark a 6″ diameter circle around the spot we marked initially. To start, we’ll pre drill a hole along the edge of the circle large enough for the jigsaw blade to begin cutting. Be very careful to not drill too far out of the circle you have drawn- to keep the shape exact. Next, finish cutting using the jigsaw.
This can be a very challenging step, we would suggest using a 6 inch hole saw alternatively for that perfect cut.
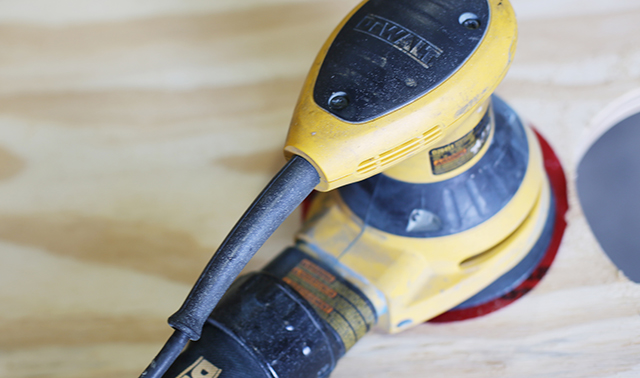
Step 5: Sand the Cornhole Board
Using an electric sander (or a lot of elbow grease) sand the top of the board. Next you’ll be applying a primer paint to the surface and let that dry. I know we mentioned we wouldn’t be painting, and from a design perspective we aren’t. The primer will be covered in a glossy paint next- this will help the adhesion of our vinyl.
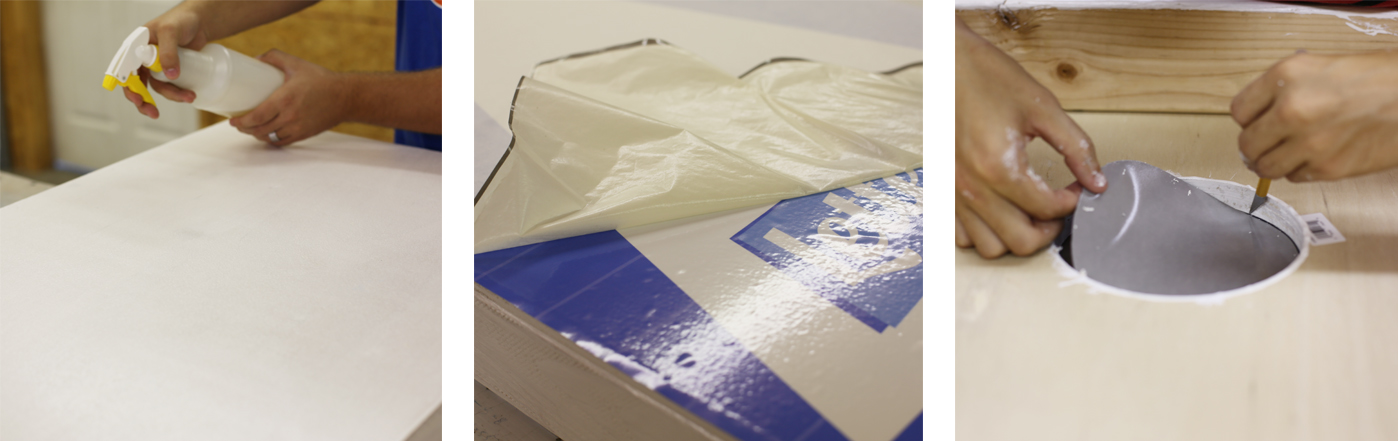
Step 6: Applying the Vinyl
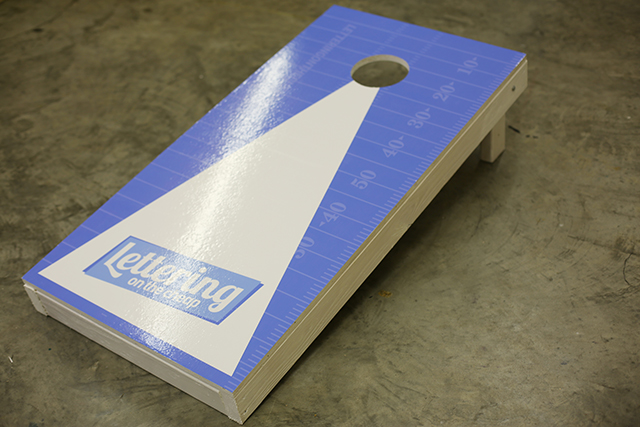
With our design being ordered from Lettering on the Cheap, we’ll apply our vinyl on top of our Cornhole Board. We’ve made sure to order our vinyl with a little extra space around the border. We’ll cut this off once we’ve applied the vinyl to the board. There are a number of fantastic in detail tutorials you can find here, for more information on applying vinyl. Once the vinyl is set, cut around the outside edges of your Cornhole board carefully to remove the excess vinyl. Next, we’ll be cutting the hole back into our board, but cutting the vinyl away.
Success!
We couldn’t be happier with our success, and we hope to see many photos of your own successes! Add a comment below and follow us for future DIY giveaways!